English
 中文简体
Tie dye has a reputation for being loose and unpredictable, and that is part of the fun. But the difference between a muddy bundle and a crisp spiral usually comes down to preparation, fiber choice, and a little patience. If you have ever wondered how do you tie dye fabric without ending up with a gray-brown mess, this guide walks through the practical side: what to wash, how to tie, which dye to use, and how to rinse so the color stays where you put it.
Because we work with knitted fabrics every day, we will also talk honestly about fabric choice. Cotton is forgiving. Polyester is not. A cotton sweatshirt and a polyester mesh shirt can use the same tie pattern and still behave completely differently.
What Tie Dye Needs From a Fabric
Tie dye is a resist process. You fold, twist, or bind the fabric so the dye cannot reach every part of it. The fabric then needs to accept dye evenly where it is exposed and hold it through rinsing. Fiber content, absorbency, and structure matter most.
Natural fibers such as cotton, rayon, and linen take fiber-reactive dyes well. The color bonds chemically to the fiber, which is why cotton tie-dye shirts keep their brightness after many washes. Synthetic fibers such as polyester are different. They are smooth and hydrophobic, so water-based dyes tend to sit on the surface or wash out. Polyester needs disperse dyes, higher heat, or a professional dye house. Blends sit in between: the cotton portion takes dye, while the polyester portion may stay pale or take on a heathered look.
Knit structure also matters. A tight jersey or rib knit can be tied firmly without distorting. A loose mesh or open knit may let dye travel farther under the ties, which can soften the pattern. Always test a small swatch before you commit a finished garment to the dye bath.
Choosing a Blank: Start With the Fiber, Not the Color
For a first project, choose a 100% cotton blank. A cotton T-shirt, sweatshirt, or cotton pique polo is easy to find, takes fiber-reactive dye beautifully, and gives predictable results. If you want texture, a waffle knit or a cotton-rich air-layer fabric can produce interesting surface variation, though the thicker the fabric, the longer the dye needs to penetrate.
For a cotton-rich starting point, our pure cotton breathable warm sweatshirt fabric is a substantial knit that works well for a heavier tie-dye sweatshirt. A cotton-polyester air-layer fabric can be used if you are willing to test how the blend takes color, and a waffle knit comfort fabric is a good choice when you want the tie-dye pattern to interact with a textured surface. Sample first, then scale up.
 Pure Cotton Breathable Warm Sweatshirt FabricSubstantial cotton-rich knit for heavier tie-dye sweatshirts, with soft warmth and breathability for autumn and winter casual wear.View Product →
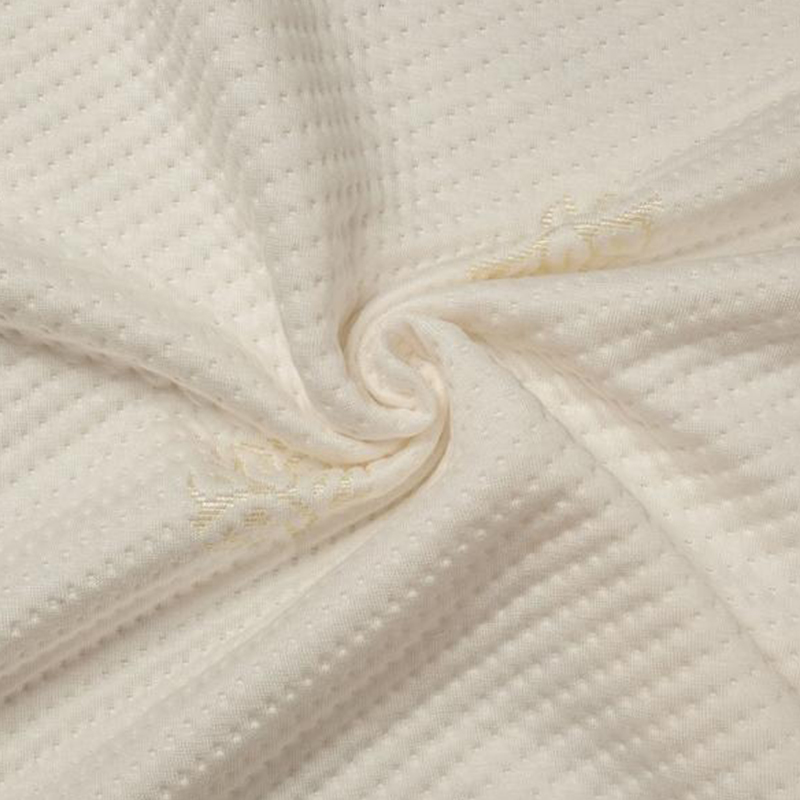 Cotton Polyester Warm Silk Air Layer FabricCotton-polyester air-layer fabric for testing dye uptake, with added elastic support for warm clothing and waist or knee pads.View Product →
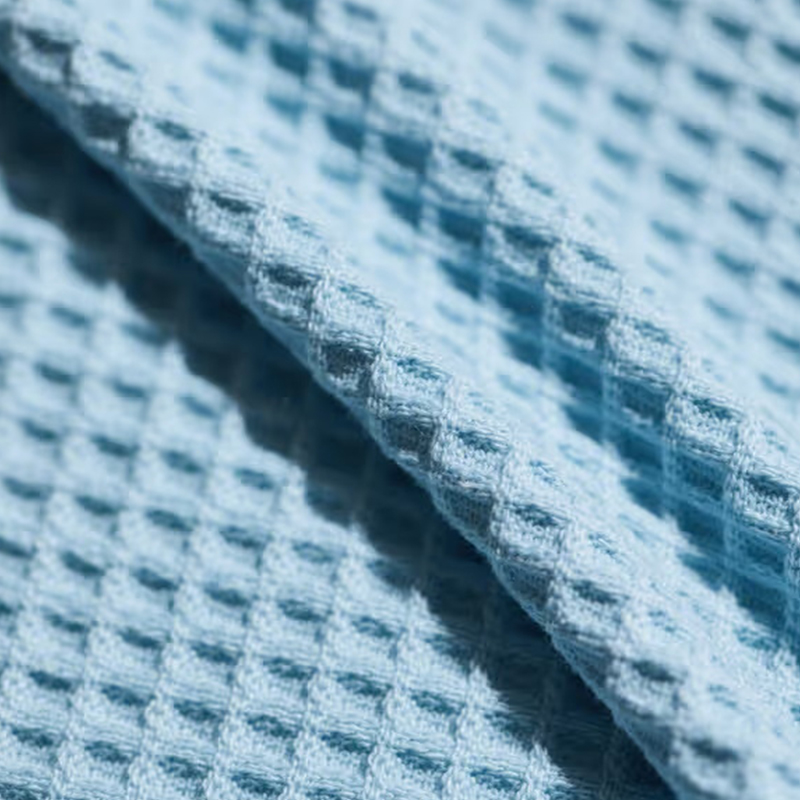 Textured Waffle Knit Comfort FabricLightweight, breathable waffle-textured knit for summer shirts and sports towels, letting tie-dye patterns interact with a textured surface.View Product →
If you are working with polyester knits, such as a birdseye mesh or a smooth milk silk fabric, read our guide to dyeing polyester birdseye mesh before you start. It explains why standard tie-dye kits often disappoint on synthetic fabrics and what to do instead.
The Step-by-Step Tie Dye Process
The basic rhythm is the same whether you are dyeing a T-shirt, a pair of socks, or a length of knit fabric. Work in a ventilated space, wear gloves, and cover your table. Dye is permanent on fabric and semi-permanent on countertops.
Step 1: Wash and soak
Wash the fabric without fabric softener. Softener and sizing can block dye absorption. If the fabric is new, a hot wash helps remove mill finishes. Then soak it in warm water and wring it out so it is damp, not dripping. Damp fabric helps the dye spread more evenly and makes folding easier.
Step 2: Mix your dye
Follow the dye manufacturer’s instructions. For fiber-reactive dyes, you will usually dissolve the dye powder in water first, then add a chemical water mixture and a soda ash solution. Keep separate bottles for each color and label them. If you are using a tie-dye kit, mix only the colors you need and use them within the recommended window.
Step 3: Tie and bind
This is where the pattern is made. Use rubber bands, sinew, or strong thread. The tighter the bind, the sharper the white resist. But do not tie so tightly that the fabric bunches into a hard knot; dye still needs to reach the exposed areas. For a spiral, pinch the center and twist the fabric into a flat coil, then band it like a pie. For stripes, fold the fabric accordion-style and band at intervals. For a crumple, gather the fabric into a loose ball and secure it with several bands.
Step 4: Apply dye
Work over a tray or sink. Apply dye to the exposed sections, turning the bundle as you go. Use squeeze bottles for control and a spray bottle for softer blends. Do not saturate the whole bundle; leave some dry areas so the resist can work. If you want a two-color spiral, apply one color to one side and a second color to the other, then add a small amount of a third color at the center if you like.
Step 5: Wrap and wait
Place the bundle in a sealed bag or wrap it in plastic film. Keep it warm and undisturbed. Fiber-reactive dye on cotton usually needs several hours to bond; overnight is common. Check the manufacturer’s timing, but do not rush. The waiting period is when the color becomes part of the fiber instead of a surface stain.
Step 6: Rinse, wash, and dry
Rinse in cold water first, while the bundle is still tied. Gradually remove the bands and keep rinsing until the water runs mostly clear. Then wash the fabric in warm water with a mild detergent, rinse again, and dry. For the first few washes, wash separately from light-colored clothing.
Tie Patterns Worth Trying
Once you understand the resist, the patterns are simple variations on folding and binding.
- Spiral: twist from the center into a flat coil and band it into wedges. This gives the classic pinwheel look.
- Bullseye: pinch a point and band it at increasing distances. Dye each ring a different color for concentric circles.
- Crumple: gather the fabric into a loose ball and band it randomly. The result is soft, mottled color with irregular white veins.
- Accordion stripes: fold the fabric back and forth like a fan, then band it at intervals. Dye between the bands for horizontal or vertical stripes.
- Triangle fold: fold the fabric into a triangle, then band the corners. This is a good way to make repeating geometric motifs.
Practice on a small cotton swatch first. The same fold can look different on a thick sweatshirt and a thin jersey, because the fabric’s thickness affects how far the dye travels under the bands.
Fabric and Dye Compatibility at a Glance
| Fabric type | Best dye | Tie-dye result | Notes |
|---|---|---|---|
| 100% cotton | Fiber-reactive | Bright, lasting color | Easiest for beginners; prewash to remove sizing |
| Cotton/poly blend | Fiber-reactive on cotton portion | Softer, heathered tones | Polyester portion may stay pale; test first |
| Polyester | Disperse dye or professional dyeing | Limited with home kits | Needs heat; standard tie-dye kits often wash out |
| Rayon or milk silk | Fiber-reactive or direct dye | Deep, drapey color | Gentle handling; may shrink or distort |
| Nylon | Acid dye | Bright but tricky at home | Test carefully; heat can damage some knits |
Common Problems and Simple Fixes
- Muddy colors: Too many colors overlapping. Use fewer colors, leave white space, and apply dye in separate zones.
- Weak color: Fabric was damp but not soaked, or the dye was mixed too weak. Check the dye-to-water ratio and give the bundle enough time.
- Dye bleeding: The bundle was too wet or the rinse started too late. Rinse in cold water before you untie, and wash separately the first few times.
- Stiff fabric: Detergent residue or dye thickener. Rinse more thoroughly and use a mild detergent without softener.
- Pattern lost in the wash: The dye did not bond. For cotton, make sure you used soda ash and enough time; for polyester, use the correct dye system.
Washing and Living With Tie Dye
Turn the garment inside out and wash in cold or warm water with a mild detergent. Avoid bleach and fabric softener, both of which can dull the color. Line dry or tumble dry low. If the fabric is a stretch knit, dry it flat or on a low setting to prevent distortion. For the first few washes, keep the piece away from white towels and light sheets.
If you are dyeing fabric for a group, a class, or a small production run, make a test swatch with the exact fabric, dye, and water you plan to use. That one small step prevents most surprises.
A Mill’s-Eye View on Tie Dye Blanks
We produce knitted fabrics for apparel, sportswear, and everyday wear, and we see a lot of blanks that look similar but behave very differently in a dye bath. A cotton-rich knit is the most predictable starting point for tie dye. A polyester knit can still be dyed, but it needs the right dye class and heat, and the result will usually be softer or more heathered than a cotton T-shirt. If you are planning a small run, ask for a swatch of the exact fabric you intend to use, then dye that swatch before you cut and sew.
If you need a cotton pique, a sweatshirt knit, or a textured waffle knit to experiment with, start with a sample. It is easier to adjust your dye recipe on a half-yard than on a finished garment.
Tie dye is one of the few textile processes that rewards a relaxed approach and still gives you a usable result. Choose a fabric that suits your dye, tie it firmly, give the color time to bond, and rinse patiently. The first piece may be a learning curve, but the second will be better, and the third will start to feel like a recipe you can repeat. That is how do you tie dye fabric, really: one swatch, one fold, and one rinse at a time.